


Insider Secrets for Stunning Display Cakes
Your bakery display case is your face to the world. It gives customers a window into cake design possibilities and puts your decorating talents front and center. Based on my experience, I’m sharing some tips and tricks for creating stunning and durable display cakes.
What you’ll need:
• Styrofoam cake forms – for a shelf-stable, more efficient and
polished look
• Royal icing – it sets up quicker and lasts up to 6 months
• Wet towels – I’ll explain why in the steps below
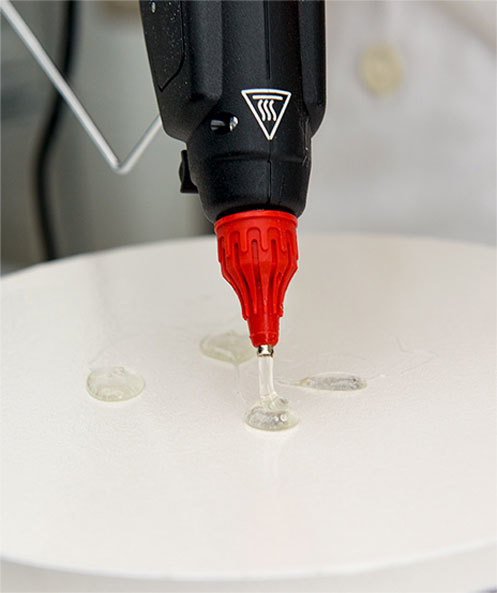
• A glue gun – it will be your best friend through the process
• Turntable & other decorating tools – for your display cake design
Here’s your step-by-step tutorial for creating great display cakes.
Looking for a specific cake design? Find step-by-step instructions for more DIY display cake designs here.

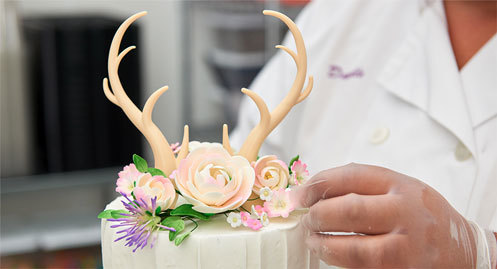
Rustic Elegance Wedding Cake

Step 1: Set up your workspace with a turntable, tools and royal icing.
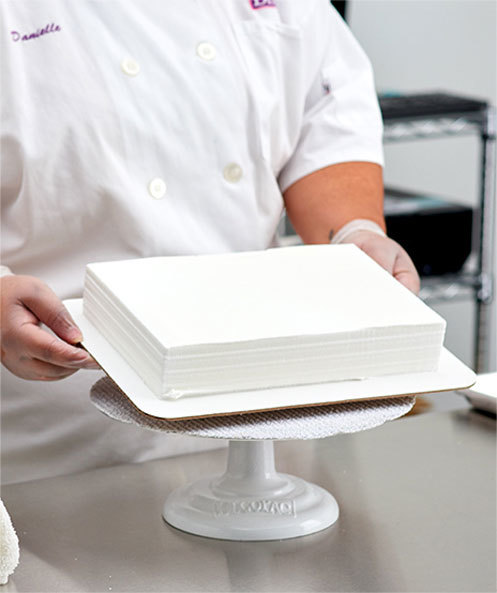
Step 2: Attach the 8" triple layer Styrofoam cake form to a cake board with your glue gun.
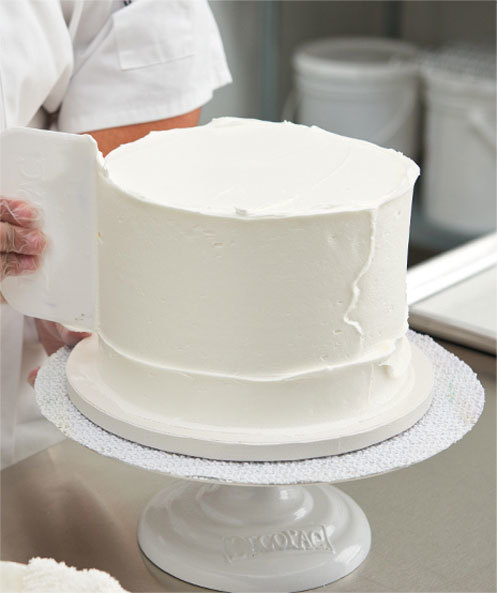
Step 3: Cover the cake with a base of royal icing and smooth it out with a scraper. Work quickly as royal icing gets “crusty” fast.
![]() Tip: Wipe the royal icing off your scraper with a wet towel as you go.
Tip: Wipe the royal icing off your scraper with a wet towel as you go.
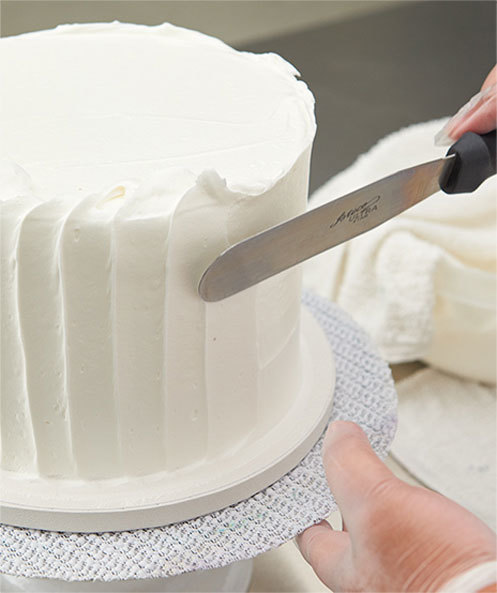
Step 4: Use your spatula to add texture and smooth off the cake top with your scraper.
![]() Tip: During decorating, cover your bowl of royal icing with a wet towel to keep it from drying out.
Tip: During decorating, cover your bowl of royal icing with a wet towel to keep it from drying out.
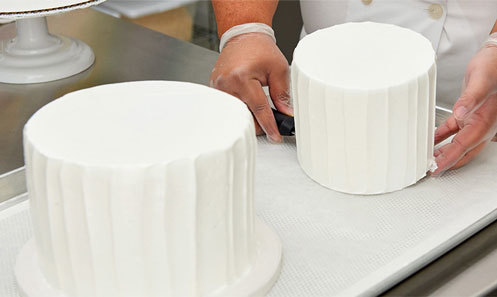
Step 5: Set the bottom tier on a rack to dry for 24 hours. Create the 6" triple layer round top tier by repeating the above steps.
![]() Tip: Instead of gluing the cake to a board, add icing to the bottom of the additional tiers to secure on the cake board.
Tip: Instead of gluing the cake to a board, add icing to the bottom of the additional tiers to secure on the cake board.
Step 6: When the top tier is iced, move it to the drying rack
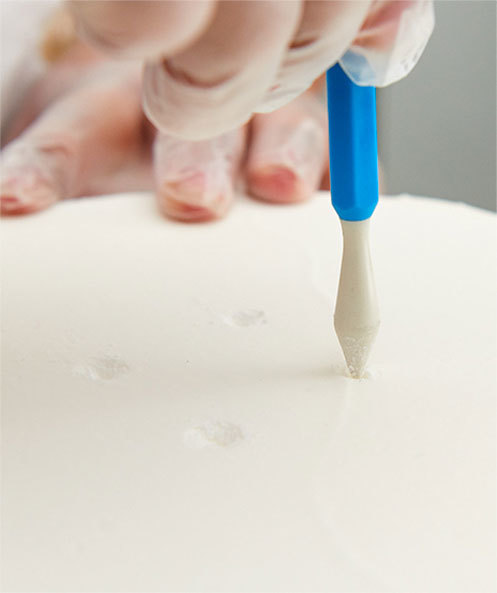
Step 7: Once both tiers are dry, use your fondant tool to make small holes in the bottom tier. Then use your glue gun to overfill the holes and attach the top tier.
![]() Tip: The glue-filled holes add extra stabilization for the top tier, similar to cake dowels.
Tip: The glue-filled holes add extra stabilization for the top tier, similar to cake dowels.
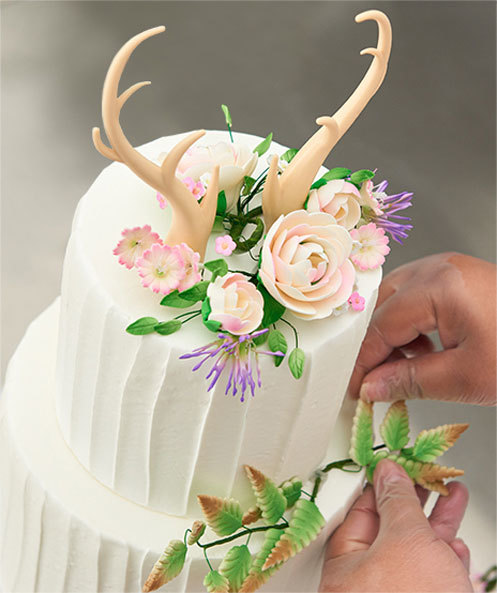
Step 8: Now it’s time to add the decorations! I’m using our new antler creations DecoSet® and Gum Paste flowers for a rustic elegance. Place the decorations on the cake, and secure them in place with your glue gun—it’s such a useful tool—see why I love it so much!
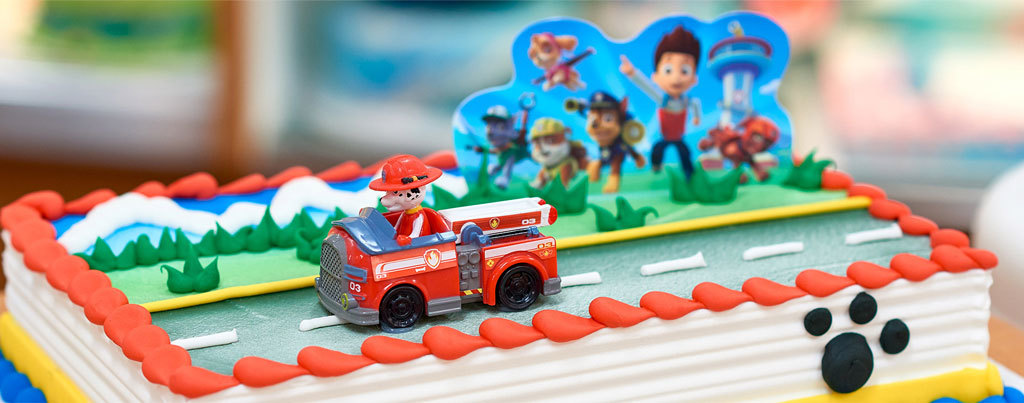
PAW Patrol™ Just Yelp for Help Cake
Get kids excited for their birthdays with kid-themed cakes in your display case. By featuring the hottest characters, customers will know your bakery is trend-forward, too.
Step 1: To prepare this PAW Patrol™ Just Yelp for Help cake for decorating, follow steps 1 – 3 above except with a ¼ sheet cake and board, and set on a drying rack for 24 hours.
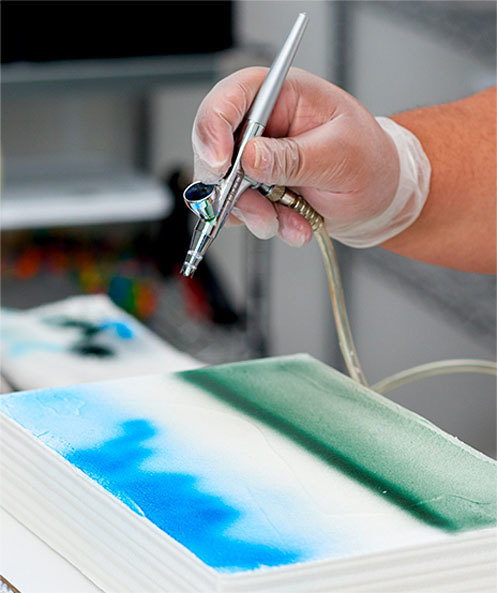
Step 2: Airbrush your display cake the way you would a regular cake. (If icing the cake background, be sure to use royal icing for this step.)

Step 3: Pipe the bottom border and road edge using yellow royal icing. Pipe as you would for buttercream, massaging the bag to get the air bubbles out.
![]() Tip: Keep each tip covered with a wet towel if you’re switching icing bags so the royal icing won’t dry up and clog the tip.
Tip: Keep each tip covered with a wet towel if you’re switching icing bags so the royal icing won’t dry up and clog the tip.
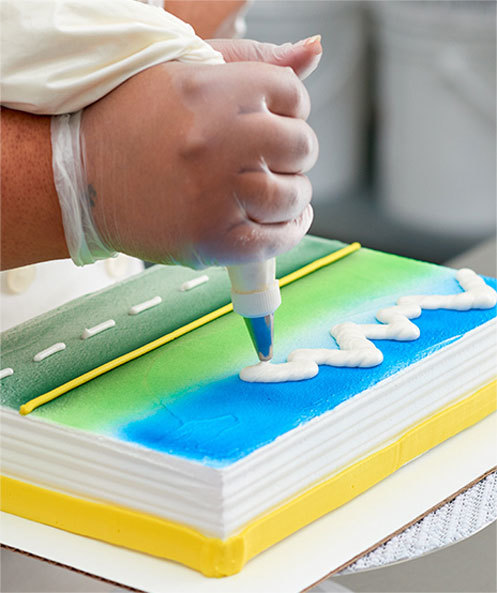
Step 4: Pipe the white road markings and mountaintops using white royal icing.
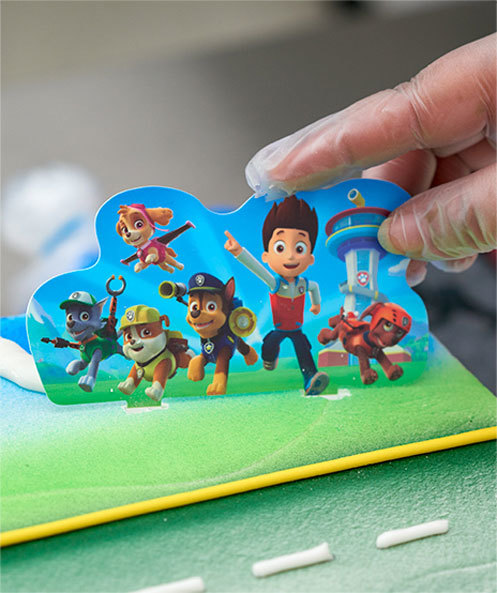
Step 5: Using the PAW Patrol™ DecoSet®, add Ryder and the pups. Secure them in place with your glue gun.
![]() Tip: Once again, use a fondant tool to pre-mark placement of the background piece. Make holes so it’s easier to place.
Tip: Once again, use a fondant tool to pre-mark placement of the background piece. Make holes so it’s easier to place.
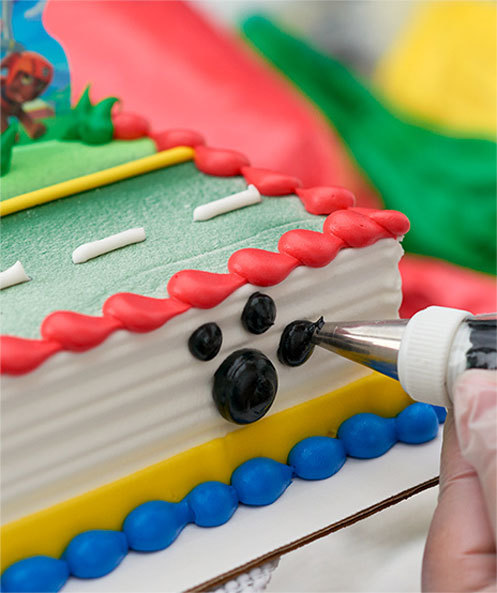
Step 6: Pipe a red top border, green trees, a blue bottom border, and don’t forget the paw print!

Step 7: Did someone “Yelp for help?” Finish off your display cake with Marshall. This time, it’s your glue gun to the rescue—making sure this rolling fire truck stays in place.
Follow these steps for displays cakes that last up to six months. After six months the colors will begin to fade.

• Create a display cake schedule so your bakery is rotating cakes out regularly and prepared to showcase cakes for important events like graduation.
• Plan ahead. Due to drying time, it takes a couple of days to create a display cake.
• Once the cakes are set, keep them dry or the royal icing will breakdown and colors will bleed. ![]()

ABOUT THE DECORATOR
Hey there, I’m Danielle. I started decorating cakes with my Grandma when I was six years old. It was a fun hobby we enjoyed together. As I got older, I dreamt of going to art school or becoming the next Alicia Keys, but when I was sixteen my Grandma passed away. So when the Cordon Bleu came into my home ec class, I thought. “That’s it. I can still be an artist, and take the Bubba with me the whole time.” That’s why I love being a cake designer and decorator at DecoPac—I get to create amazing, edible art with my Grandma smiling over my shoulder.